
Requirements:
In this blog, we will learn how to send an email on the trigger of a button in the Canvas app by using Power Automate.
Implementation:
- Go to https://make.powerapps.com.
- Click on “Apps” on the left navigation panel.
- Select “Canvas.”
- If you do not want to create a new Canvas app, you can use the old one.

- Give a title to your Canvas app.
- Select any layout, here we have selected a “Tablet” layout.
- Click on “Create.”

- Click on “Insert.”
- Now add a “Text label” and change the text value to “Send an email.”

- Place this text label at the top for creating a Header.
- Add 3 more “Text labels” and place them vertically.
- And change their names to “To,” “Subject,” and “Body.”
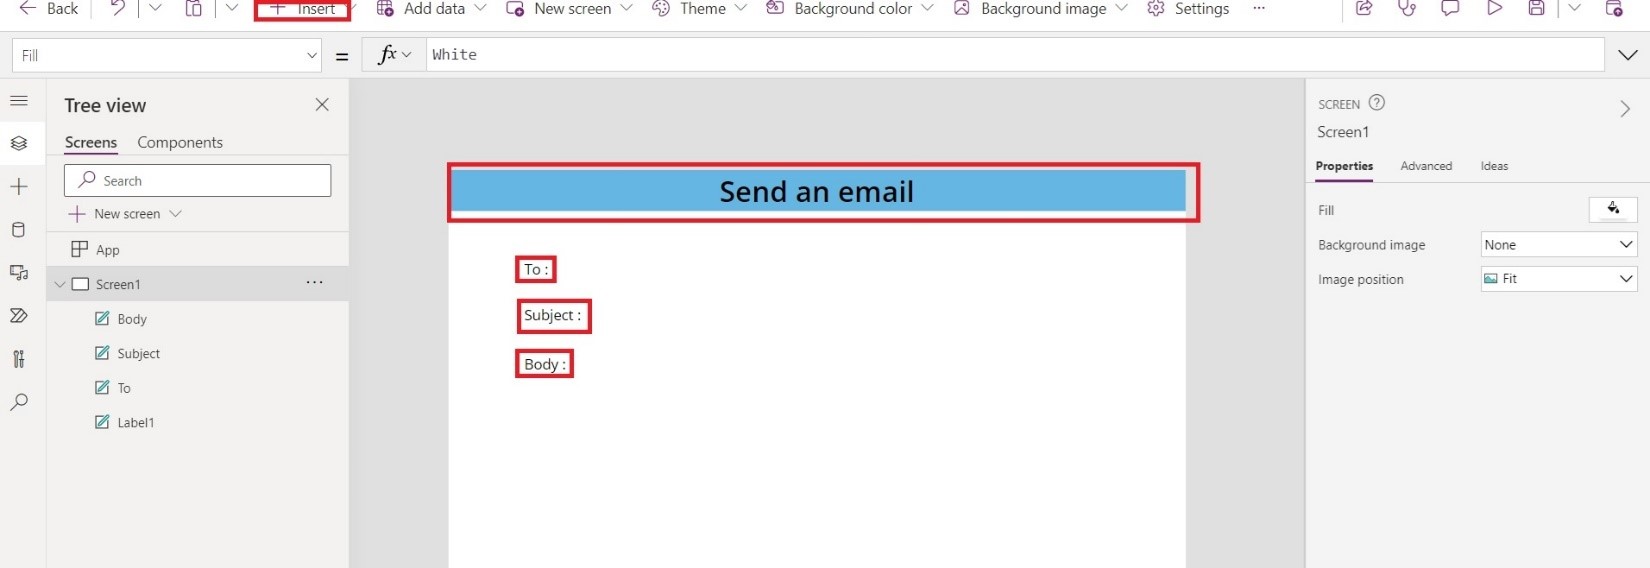
- Add 3 “Text inputs” and place them parallel to “Text labels.”
- Rename “Text inputs” and “Text labels” from the tree view on the left pane.
- And remove the default value from the “Text inputs.”

- Change the display mode of “Bodyinput” (text input) “single line” to “Multiline.”

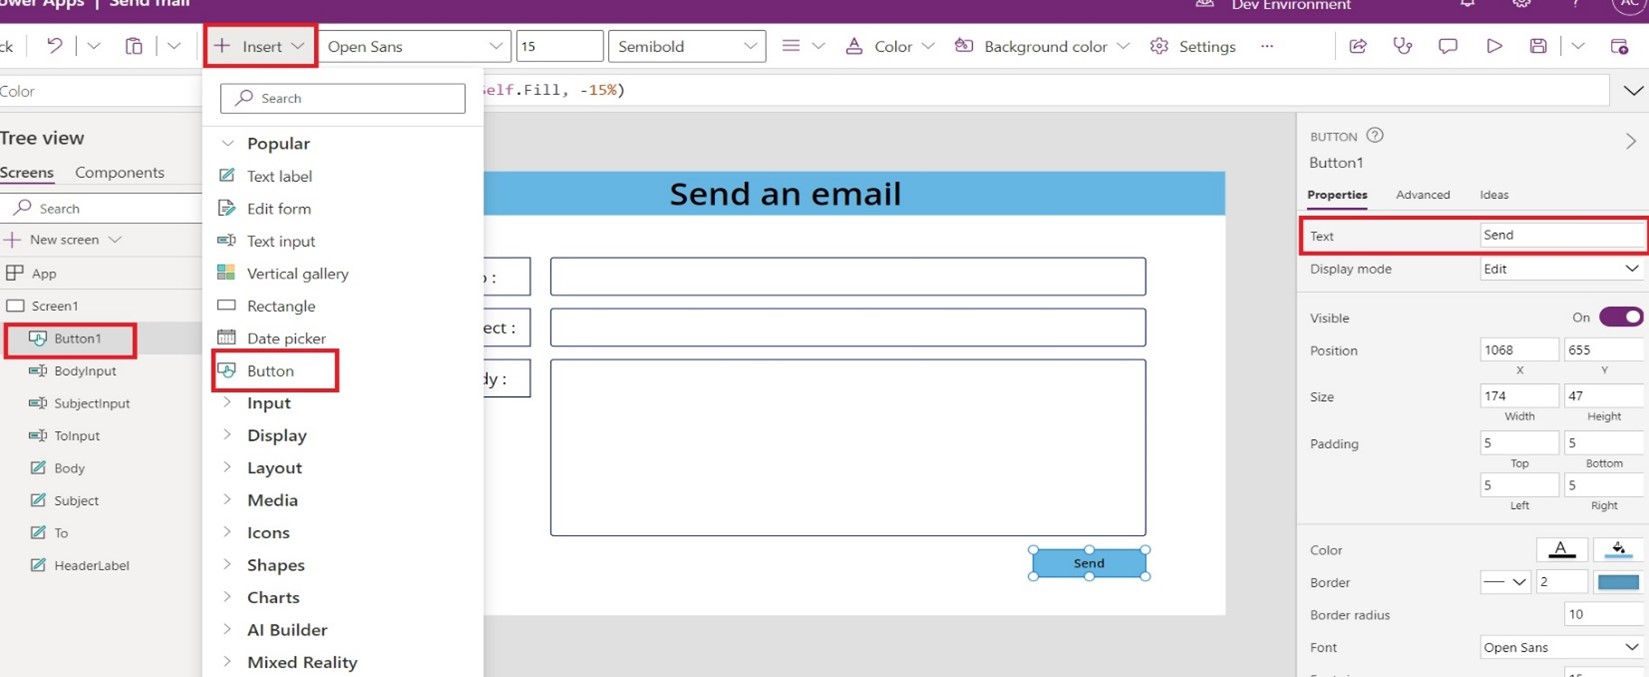
- Click on “Insert.”
- Select “Button.”
- Change the button name from the tree view in the left navigation pane.
- Change the text properties of the button to “Send” from the properties pane on the right.
- Let’s create a Power automate.
- Go to https://make.powerapps.com.
- Sign into power apps.
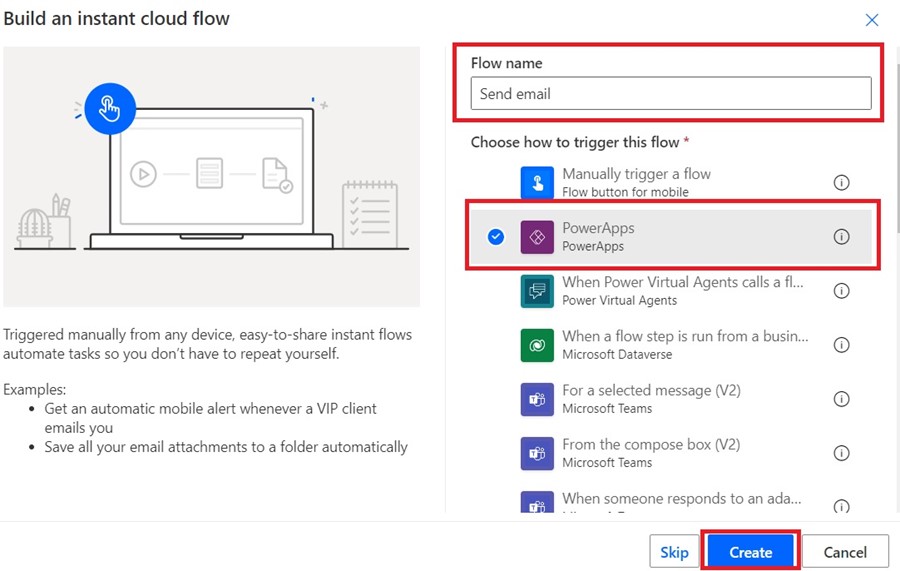
- Click on “Flows” in the left navigation panel > “+New flow.”
- Select “Instant cloud flow.”

- Give a title to your flow.
- Select “PowerApps.”
- Click on “create.”
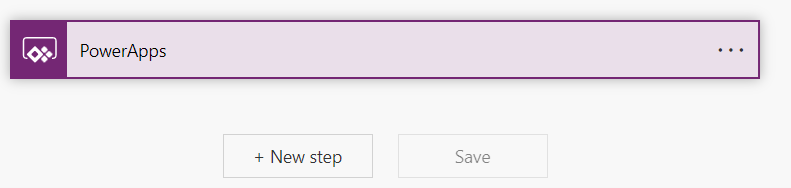
- Now, we will trigger the flow from Canvas app.
- Click on “+ New step.”
- Search “Send an email” in the new step.
- Select “Send an email(V2).”
- Here, we are using office 365 outlook for sending emails.

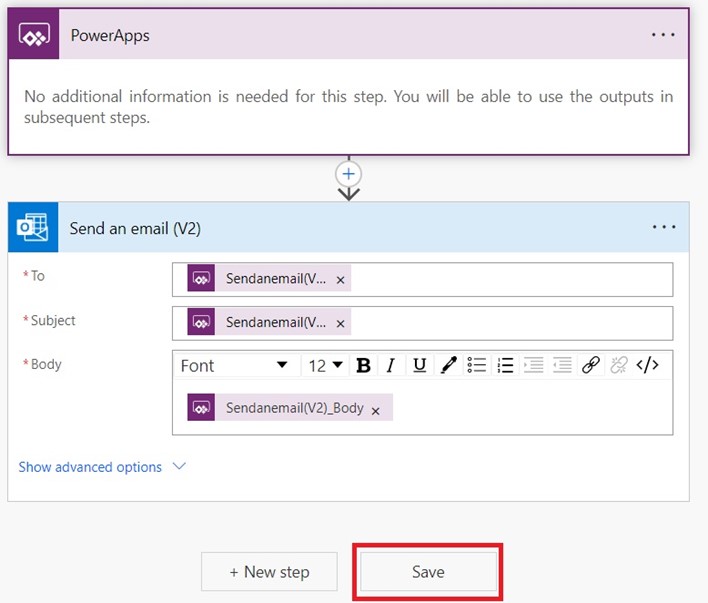
- In the next step Click on “To.”
- And add dynamic content.
- Click on “Ask in power apps” it will automatically fill dynamic content in the “To” data card.

- Now click on “Subject” > “See more” > “Ask in power apps.”
- It will suggest dynamic content for the “subject.”
- Do follow the same step for “Body.”

- Your flow will look like this and save your flow by clicking on “Save.”
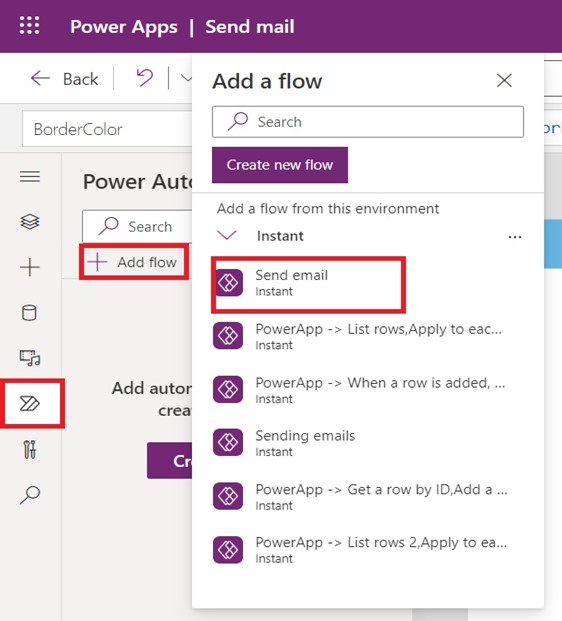
- Let’s connect this Canvas app to power automate.
- Click on the “power automate” on the left navigation panel in Canvas app.
- Then click on “+Add flow.”
- Select the flow which we have created.
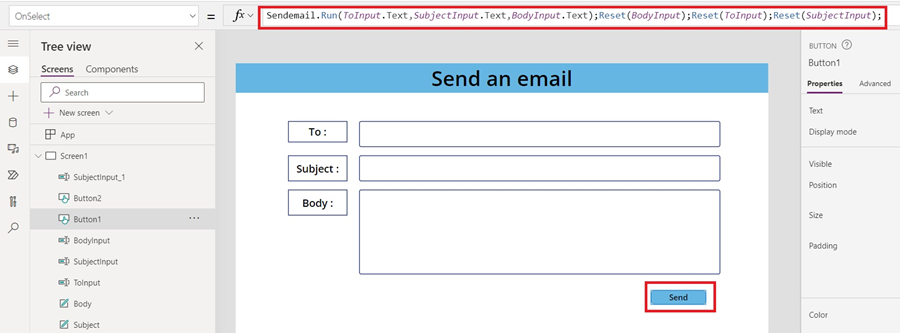
- Click on the button, and write this function on the “OnSelect” property of a button.
Sendemail.Run(ToInput.Text,SubjectInput.Text,BodyInput.Text);Reset(BodyInput);Reset(ToInput);Reset(SubjectInput)
- Save and publish.
Hope it helps!
Power 365ing as usual!
Any problem in Power Platform or Dynamics 365 – end user, Microsoft partner or an individual?
Problem Area – Technical, Functional, Training, Development, or consulting?
Me and my team are here to assist, please fill the following form for your business needs: Click here
About the Author:

