
In the last post we learnt how to add a command button using command designer: https://dynamicsofdynamicscrm.com/2022/07/27/step-by-stepcreate-command-button-in-power-apps-using-command-designer/
In this post, we will explore various Power FX commands we can add using new command designer:
We will cover the formulas “Navigate”,” URL” and “Notify”.
First go to the site map for Account table and click in the three dots ,click on edit command bar. Thereafter select the Main grid.

Three buttons are created as per reference in my last blog.

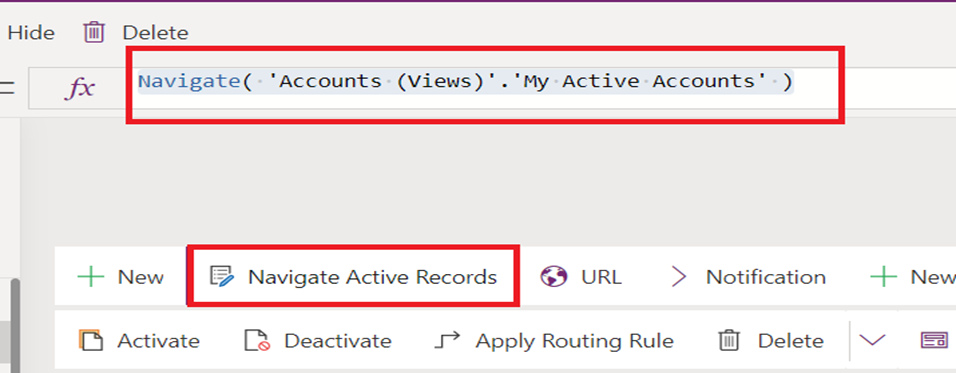
On click of “Navigate Active Record” button, we will navigate to “My Active Accounts” view
- Formula for Navigate.
Navigate(‘Accounts (Views)’.’My Active Accounts’)
- Result:
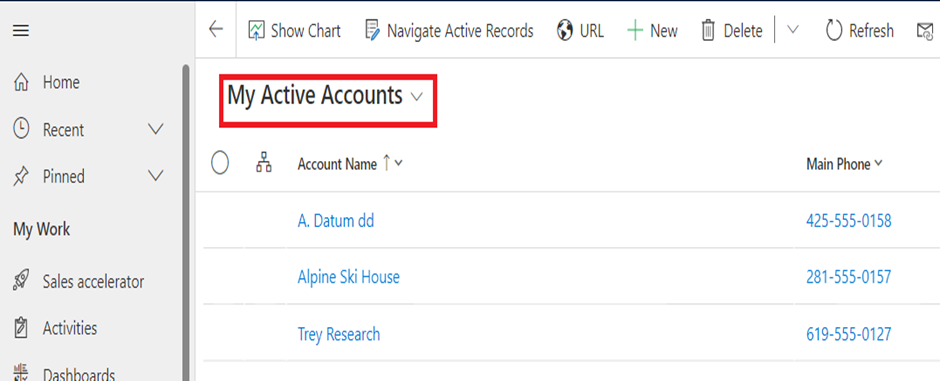
Now let us try to click on Navigate Active Records on Inactive Accounts view:

You can see that on click of the button we have navigated to “My Active Accounts” view:
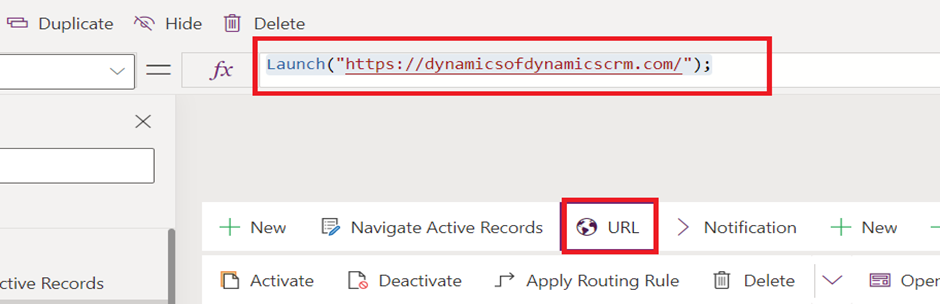
Formula for URL:
Launch(“https://dynamicsofdynamicscrm.com/”);
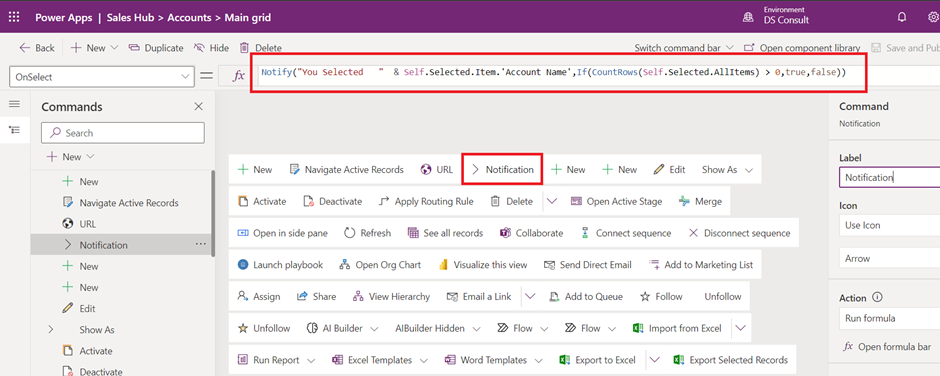
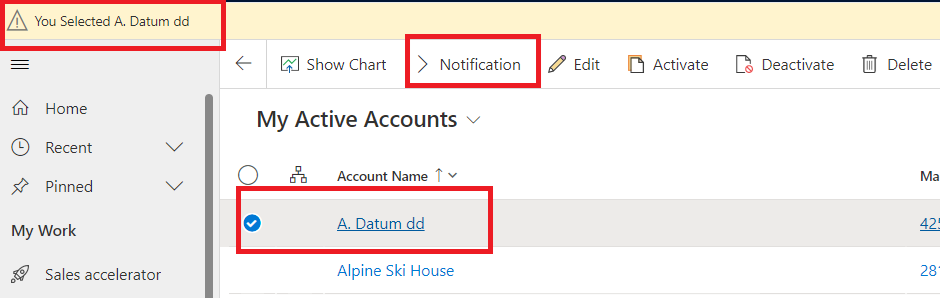
Formula for Notify:
On click of Notification command button, we will try out Notify command:
Notify(“YouSelected”&Self.Selected.Item.’AccountName’,If(CountRows(Self.Selected.AllItems) > 0,true,false))
- Outcome:
There is a show hide formulae also applied on this button(about which we will learn in my next article). The button will only be visible on selection of particular record:

On selecting a single account named “A.Datum dd” and clicking on the “Notification” button, you can see above that the name of the record is showing in the notification section.
Hope it helps!
Power 365ing as usual!
Any problem in Power Platform or Dynamics 365 – end user, Microsoft partner or an individual?
Problem Area – Technical, Functional, Training, Development or consulting?
Me and my team are here to assist, please fill the following form for your business needs: Click here
About the Author:

